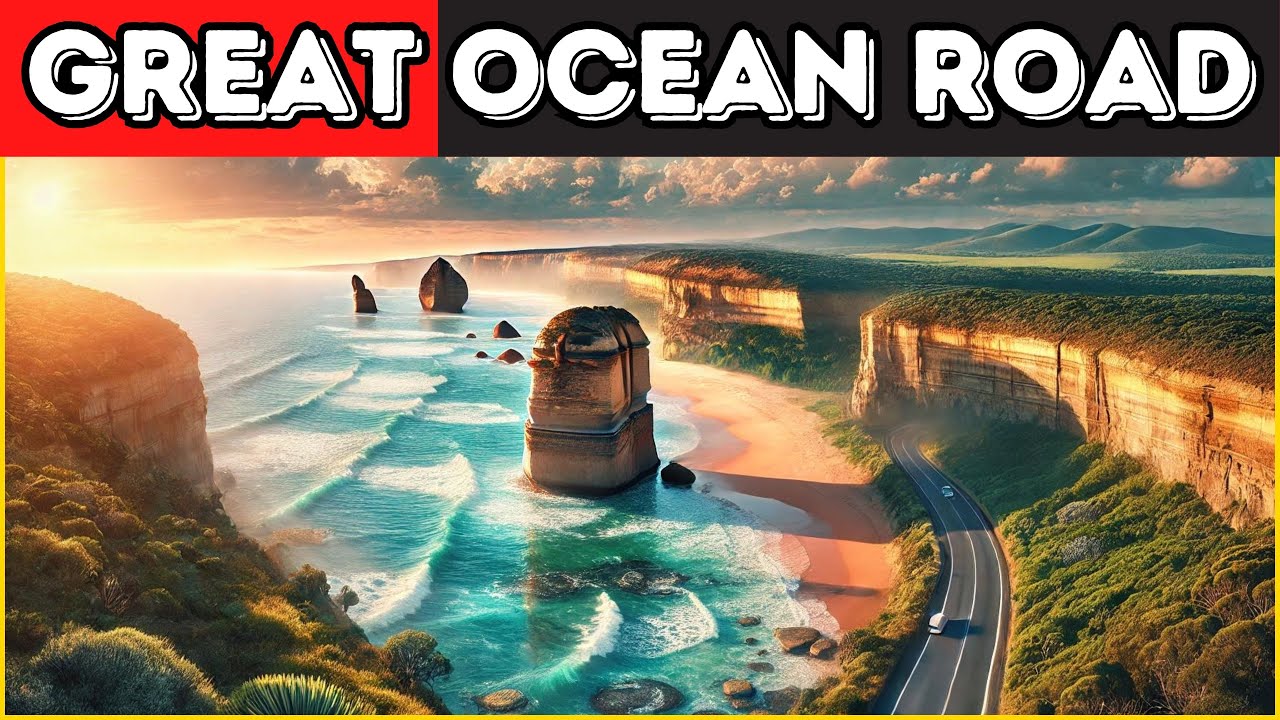
Roughly 243 kilometers of winding cliffside road contains over 100 distinct visual archetypes, ranging from temperate rainforests to sheer limestone stacks rising 45 meters out of the Southern Ocean. This stretch of the Great Ocean Road isn’t just a drive; it is a visual assault on the senses, offering one of the most dynamic landscapes in Australia. However, while millions of visitors drive this route every year, very few manage to capture its true personality. The challenge isn’t just finding the scenery—it’s seeing past the postcard shots to document the authentic, raw soul of the coastline. To move beyond the average snapshot and create images that resonate, you need a tactical approach that respects the light, the geology, and the mood of this rugged environment.
The “Pre-Dawn” Protocol: Timing & Planning
Success on the Great Ocean Road is rarely about luck; it is about discipline. While many guides will tell you the “best time to visit” is summer, a photographer knows the truth lies in the specific atmospheric conditions of the Shipwreck Coast. We aren’t talking about a generic window of time; we are talking about a tactical checklist for the hour *before* the shutter clicks.
Understanding the interplay between the “Golden Hour” and the “Blue Hour” is critical, especially when dealing with limestone geology. Limestone doesn’t just absorb light; it reflects it with a warmth that can turn into a blow-out of white highlights if you aren’t careful. Conversely, the Blue Hour offers a moody, ethereal softness that brings out the texture in the rock stacks without the harsh contrast of midday sun.
Mastering the Coastal Fog
The weather along this stretch behaves differently than it does on the mainland. You might be planning for a clear sunrise, but the ocean temperature often clashes with the land air, creating a thick, low-lying fog that can ruin a wide shot or completely make a minimalist composition.
For the crashing waves that define this coast, you need to nail your shutter speed immediately. To smooth out the water enough to create a silky texture without losing the power of the crash:
- Start at 1/4 to 1/2 second: This retains some foam detail.
- For the “milky” look: Drop to 0.5s or 1s using a Neutral Density (ND) filter.
- For storm drama: Speed up to 1/250s or faster to freeze the water droplets mid-air.
The Classics Reimagined: Iconic Spots
There is no avoiding the heavy hitters, but there is a way to photograph them that doesn’t look like everyone else’s Instagram feed. We aren’t approaching these by location; we are approaching them by lens choice and composition challenge.
The Twelve Apostles: Escaping the Crowds
The problem with the Twelve Apostles is rarely the light; it is the people. The main boardwalk is a sea of tripods and selfie sticks by 9:00 AM. I learned this the hard way a few years ago. I arrived at the main viewing deck at 8:00 AM, confident I had beaten the rush. Within ten minutes, the noise of shuffling feet and chattering tourists had killed the mood. I left frustrated, feeling like I had failed to capture the majesty of the scene.
Instead of giving up, I scrambled along the cliff edge—safely—to the east, about 500 meters away. There, I found a hidden fissure in the cliff face. It offered the exact same angle of the main stacks, framed by native coastal scrub, without a single soul in the frame. The lesson? If the main deck is packed, use the geography of the coastline to find your own private window.
Loch Ard Gorge: Playing with Scale
Loch Ard Gorge is intimate compared to the Apostles, but photos often fail to convey the sheer scale of the canyon walls. Without a reference point, the 70-meter-high cliffs look like small bumps in a holiday snap.
To capture the scale, use a human subject. Position a companion in a bright raincoat at the edge of the beach or atop the stairs. Do not make them the focal point; rather, use them as a visual anchor that forces the viewer’s eye to calculate the massive height of the surrounding limestone.
London Bridge: The Sunrise Advantage
Most tourists visit London Bridge (now known as London Arch) at midday. This is a mistake. At sunset, the light hits the arch directly from the west, often washing out the golden strata layers and blowing out the highlights in a bright haze.
At sunrise, however, the light comes from behind you as you look west. It gently wraps around the rock face, revealing the deep oranges, reds, and yellows of the limestone layers without the harsh glare. The shadows are longer, giving the arch more depth and three-dimensionality.
The Rainforest Detour: Maits Rest
Shift the tone from dramatic coastline to the “Green Tunnel.” While most drivers rush past the turnoff to get to the next ocean lookout, Maits Rest offers a sensory palette reset. Walking the boardwalk here feels like entering a cathedral made of ferns and ancient Myrtle Beeches.
However, capturing the vibrancy of the fern gullies is notoriously difficult. I remember my first attempt: I reviewed the photos on my camera screen and felt a wave of disappointment. The lush, ancient forest looked flat, dark, and “muddy.” The digital sensor just couldn’t see the greens the way my eyes did.
It wasn’t until a conversation with a local photography enthusiast in a cafe in Apollo Bay that I understood the fix. He told me the secret wasn’t the exposure, but the white balance and the glare.
“You’re shooting the leaves like they’re rocks. They’re mirrors. You need to kill the reflection to see the colour.”
He tipped me off to using a polarizing filter. Most people use them for the sky, but here, you rotate the filter to cut the glare off the wet, waxy leaves. This instantly transforms the dull greens into a vibrant, deep emerald.
Just be mindful of the boardwalk conditions. It is often damp, and the planks can be slippery. Tripods are essential here for long exposures in low light, but be courteous—the walkway is narrow.
The Road Less Travelled: The Bay of Islands
If you ask a local where they go to watch the sunset, they usually won’t say the Twelve Apostles. They will head to the Bay of Islands. This is the “secret” finale of the Great Ocean Road experience.
Why do the locals skip the main Apostles carpark for this spot? Because it is rugged, chaotic, and surprisingly quiet. While the Apostles are majestic, the Bay of Islands feels wild. The stacks are more numerous, the terrain is rougher, and the angles are better for panoramic stitching.
The value proposition here is freedom. Without the massive crowds and strict boardwalks, you can climb down to the beach level (safely) and look up at the towering monuments, or walk the cliff edge to find unique leading lines in the vegetation. It is the perfect spot to finish your trip, offering a sense of discovery that the main tourist hubs often lack.
The “Battery Check” Sign-off
Before you pack up the car and head home, let’s talk about the realities of the trip. This isn’t a walk in the park; it is a physical endurance test for you and your gear.
The walkouts, particularly at Gibson Steps, involve significant sand and stairs. Sand is the enemy of camera gear. It finds its way into zoom rings and onto sensors. The coastal breeze is constant and salty. Every time you change a lens, you are inviting dust and salt spray onto your sensor. Bring a blower, use a rocket blower frequently, and change lenses inside the car or a bag if possible.
Your legs will be tired from the stairs, your arms will be sore from carrying gear, and your batteries will be drained from the cold morning winds. But the ultimate photo isn’t just a picture of the rocks. It is the feeling of standing on the edge of the continent, where the land ends and the sea begins.
Key Takeaways
- Time it right: Arrive early to beat the crowds at the Twelve Apostles and use the *Sunrise Calendar* app for precise lighting.
- Master the settings: Adjust your white balance to “Cloudy” in the rainforest and use shutter speeds between 0.5s and 1s for silky waves.
- Go local: Skip the sunset at London Bridge and head to the Bay of Islands for a rugged, crowd-free experience.
- Protect your gear: Be vigilant against salt spray and sand; change lenses in sheltered areas only.
We’d love to see how you go. Have you ever turned a “failed” shoot into an accidental masterpiece by just turning around? Share your stories and shots with us—let’s celebrate the imperfect, beautiful reality of the Great Ocean Road together.
Be the First to Comment
Sign in to start the conversation.